Seven Rules for Lighting Your Home #3: Stick to a Grid Layout
by Alden Miller | July 25, 2013 | Design Lab
Create a grid
To get started, create a scaled drawing of your room if possible. You want the ceiling lights to be evenly-spaced throughout, rather than grouped over furniture areas like many people attempt. So don’t create clusters of lights over each space in your family room! Although your furniture may be grouped to create the feel of separate areas within your room, like a sofa and TV area next to a few arm chairs with a side table area, your lighting should not be. The first step is to use your scaled drawing to divide up the ceiling into even parts, with about 36”-42” of space between each light. This is the standard baseline for installing ambient lighting. It can sometimes help to create some concentration over high activity areas, but only if the spacing feels natural and does not deviate too far from an even grid. Use your drawing to pencil in a lighting layout – does it look like a mostly evenly-spaced pattern, or does it look like Swiss cheese?
An Easy Trick to Get Evenly-Spaced Ambient Lights
One way simple way to check if there is even lighting in a room is to see how light plays over the ceiling. When you look up at a ceiling in your home, a friend’s place, or anywhere you are, the layout of the ceiling lights should feel natural. Typically the most natural-feeling layout will have evenly spaced lights. Sporadically lighting certain areas of rooms (even if the lights were added with an intended purpose) will create distraction on the ceiling, as seen in this image.
Note that when you look at this ceiling, there are clusters of lights and sporadic shadows on the ceiling. It was likely designed thinking it was providing extra light to certain areas below, but with recessed lighting a more uniform layout over the whole space is preferred.
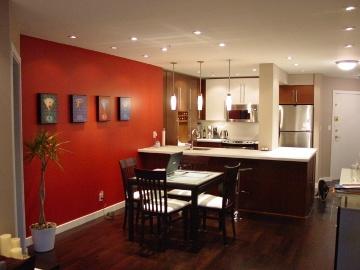
Photo: Banno Lighting
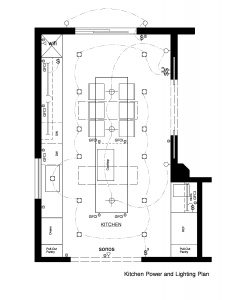
An Example: Lighting a Kitchen
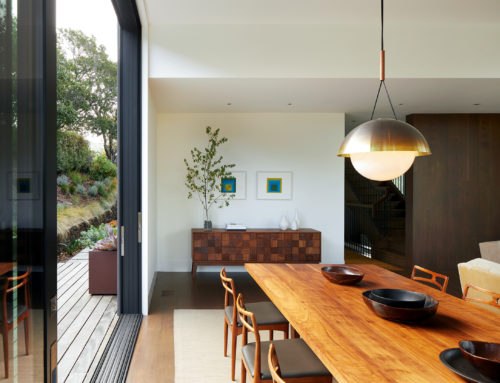
Take for example this kitchen that we are currently working on. First, we used a graphic of a circle-in-a-square to indicate each down light in our kitchen layout plan. (You might have a pencil drawing of your room which can work just fine if you draw the ceiling to scale.) We placed the main down lights in a grid across the ceiling. Next we added pendant lights over the kitchen island as a lighting accent and to provide decoration via material finish and color options. We saw that we needed to adjust the placement of the down lights ever so slightly so that they lined up with the pendants. You can see that this means there is not exact spacing between each ceiling light, but it is close. When we tested different layouts in our plan, lining up the ceiling lights with the pendants looked the most natural and didn’t change the even grid very much.
Accent Lights
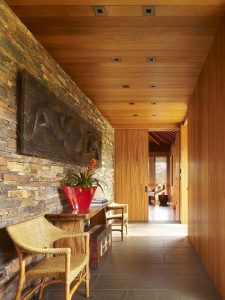
There are many different types of accent lights you can add to your main lighting grid layout. In this case, we added a small light right over the sink to function as a task light to ensure there would be plenty of light while doing dishes after the sun has set. The client also requested under counter lights. These typically function best if set towards the front of the cabinet. An alternative is to place them towards the back of the cabinet if you want to create a nice wash of light over a beautiful tile or special backsplash. Lastly, to keep the corners from feeling dark when you enter through the double pocket doors of this kitchen, we added two wall sconces, one on either side. When wall sconces are nice to look at, which so many of them are with the huge variety of options available today, they’re as good as art!
Always Start With Ambient, Even Lighting
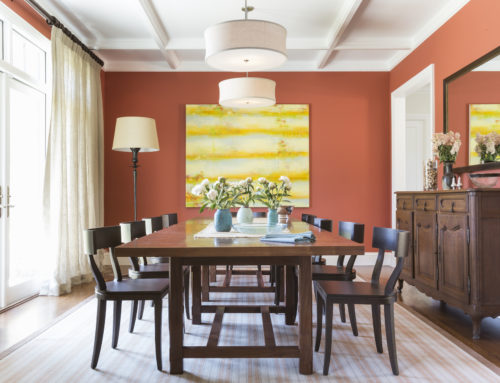
After your basic layout is prepared for where your ambient ceiling lights will go, you can begin to layer in your other types of accent lighting. You might put a decorative pendant over a dining table, or a surface-mounted fixture over the TV area. If you have a storage cabinet, special work of art, or furniture piece you want to highlight, you could change the ceiling light closest to it from a standard down light to a directional light, or you could add additional directional lights pointed towards that area. Wall sconces work really well placed on either side of a doorway, a mirror, or above a fireplace mantle. Be sure to always keep in mind where you may want to have ‘furniture lighting’ like floor lamps and table lamps, as those will add light the room as well.
Whether or not you add accent lighting, starting with a well planned ambient lighting grid for the ceiling will ensure you have nice, even lighting over the entire room.
Up Next In Our Lighting Series. . .
Next week we’ll tell you the cheapest and simplest thing you can do to improve the lighting in your house. In the meantime, go get some sunshine!
Need Help?
If you are working on a remodel of a room, or rooms, in your home and would like help with the design (including lighting!), please contact us to learn more about our services and our areas of operation.