Montara Project Kids Bath
by Alden Miller | September 16, 2013 | Kids Rooms, Kitchens and Baths, Montara - A Mountain Escape, Projects + Press


For this project in Montara, CA, we started with the kids’ bath. It was the most direct phase of the renovation as no plumbing was being relocated and we were mainly changing the finishes and fixtures.
 Main Concepts
The three main concepts to our approach revolved around functionality, visual appeal, and cost. Specifically, our goals were to (1) transform the bathroom so that it would work for three children (2) find materials that would be fun for a kids’ bath but also work for guests and be able to mature with the children, and (3) keep costs in check (so as to maintain a budget for desired improvements down the road).
Thinking Outside the Box
The existing sink area was nice and wide, but provided little storage and had only one sink. Brad and Melanie, already with two boys and planning for another child, were very clear that this would, in no way, be enough. Our goal was to have two sinks, and plenty of storage.
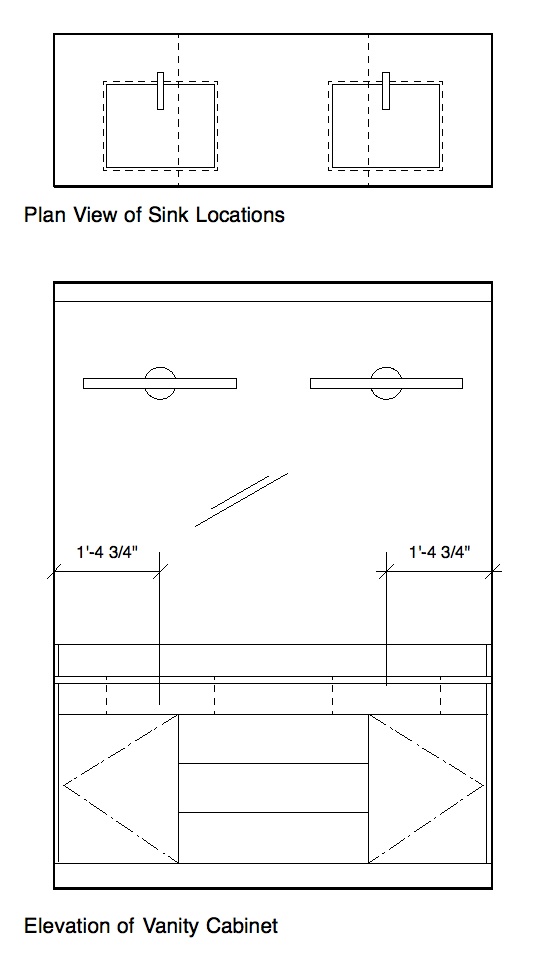
I explored both stock cabinets and semi-custom cabinets (as alternatives to custom), but the conditions were such that custom cabinetry was key in making this perfectly big enough bathroom work for three kids. In vanity areas like this (with walls on both sides and two sinks) there is a common problem: if the outside sink cabinets are big enough for the sinks to be far enough off the wall (and not be crammed), then the drawers in the center get very small and less usable. If you make the drawers in the center nice andbig (and minimize the size of the outside cabinets), then the sink location places you awkwardly close to the wall.
Custom cabinetry allowed us to have both the sink off the wall and wide center drawers for necessary storage. The way to do this, is to start with the sinks a comfortable distance from the wall and then bring the center drawers all the way to the drain pipe (check out the sketch). As you can see, the sink does not have to sit in the center of the side cabinets, but instead offset between the cabinet and the drawers. With the light fixtures still centered over the sink, nothing feels off-balance.
Focusing on Shapes and Cost
The style of the bathroom needed to be in keeping with the theme of the entire house. This was coastal mountain mixed with urban modern. The question was how to create a visual concept that would appeal to both kids and adults — and remain cost effective. I went with the idea of using fun shapes found in natural tones and materials.
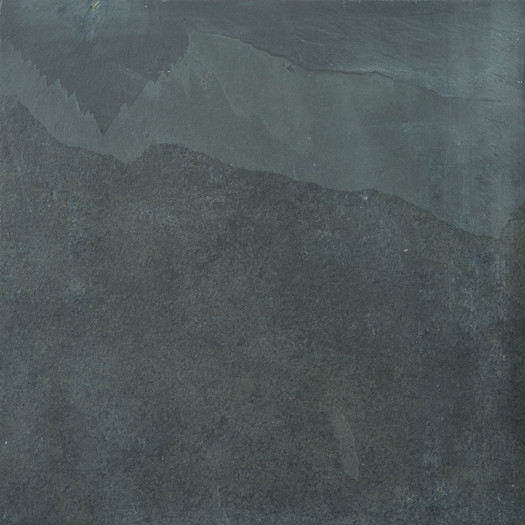
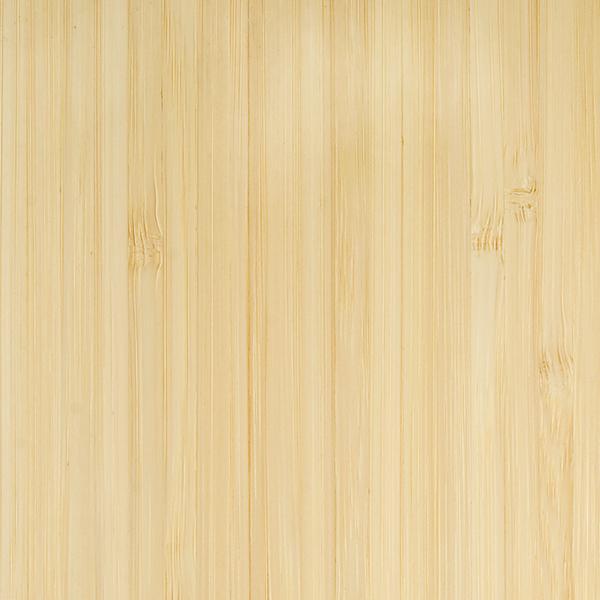
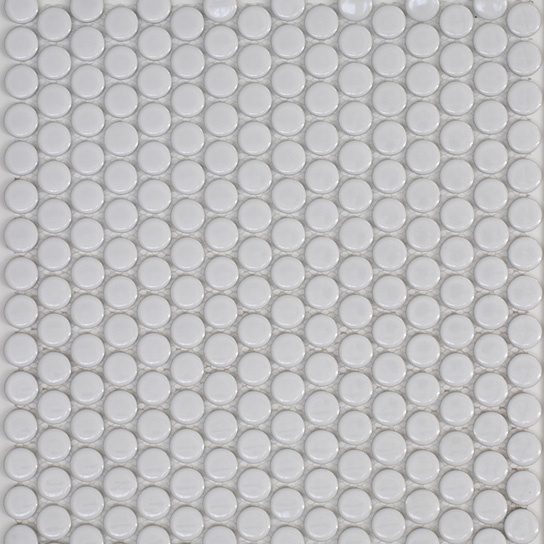
The penny round wall tile from Ann Sacks (an all time favorite of mine), along with the Brazilian black slate tile we used on the floor were both money savers. The slate comes in 12×12, but when cut down to rectangles, gives a more fun and interesting look. For the custom cabinet we chose a vertical grain bamboo. This particular bamboo pattern evokes playfulness. The vertical grain is linear, giving it a modern twist — creating fun lines and working off of the circles of the tiles. Now that I look back, it ended up being textures of polka dots and stripes, but in a subdued natural pallet. Nice!
For the countertop, we went with natural stone in a handsome gray. The stone was an affordably priced Pietra Cardosa (at around $8 a foot). Stone isn’t a cheap route for countertops, but it possesses not only a natural quality, but an excellent and sturdy edge — which, in turn, allows for an undermount sink (and neatly circumvents the water spillage issue presented by drop-in sinks).
While we went big on the custom cabinet, we saved on costs by opting for a modern Kohler sink (Kathryn), a slide in tub, and Grohe fixtures (Europlus Collection). I’m a fan these Grohe fixtures because, besides being inexpensive, they’re well made, modern and clean. We kept it simple with the paint color (warm white) so that the materials — and the reflection of the people in the mirrors — would have the main focus in the room.
Now that the kids bath was complete and the couple’s toes were wet, they were ready to start the next and more involved part of their project — the master bath.